.jpg)
Getting Started with Trezor.io/start (Version 22.9.3)
Welcome to your guide on setting up your Trezor.io/start hardware wallet! This guide will walk you through the steps needed to configure your Trezor wallet securely and effectively.
The Trezor.io/start (Version 22.9.3) setup process is straightforward and involves connecting your device to your computer, setting up your PIN, and securing your recovery seed. By following the instructions, you'll be able to ensure your cryptocurrency assets are safe.
To begin, navigate to Trezor.io/start on your web browser. This will take you to the Trezor wallet setup page where you will be prompted to download the Trezor Bridge software, which is necessary for communicating with your Trezor hardware.
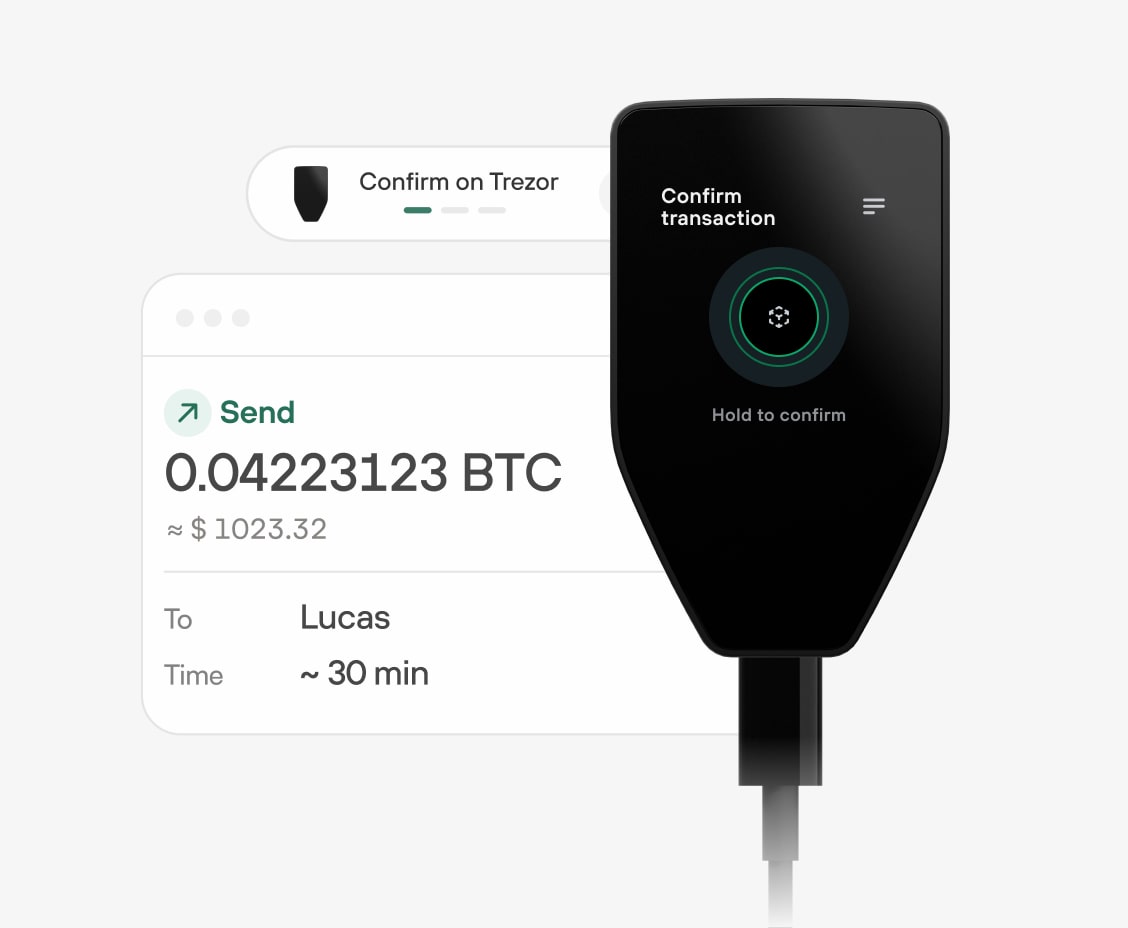
Once you've installed the software, connect your Trezor device to your computer. The website will automatically detect your hardware wallet, and you'll be guided through the rest of the setup process, including setting up a secure PIN and recording your recovery seed. These steps are essential in ensuring that your funds remain safe, even if you lose access to your Trezor device.
After completing the initial setup at Trezor.io/start, you can start transferring your cryptocurrency into your Trezor wallet, confident that your assets are protected by one of the best hardware wallets available today.
For more detailed information and additional security tips, visit our website.
How to Setup Trezor Wallet
Setting up your Trezor Wallet is straightforward. Start by visiting the official Trezor website and downloading the Trezor Suite app. Connect your Trezor device to your computer using the provided USB cable. Open the Trezor Suite app and follow the on-screen instructions. You'll be prompted to install the latest firmware on your device. Once the firmware is updated, create a new wallet and secure your recovery seed. The recovery seed is a critical component for wallet recovery in case your device is lost or damaged, so store it in a safe place.
How to Create Trezor Hardware Wallet
Creating a Trezor hardware wallet involves a few simple steps. After connecting your device and installing the Trezor Suite app, you will be guided through the wallet creation process. This includes setting up a PIN to protect your device from unauthorized access. Once the PIN is set, you will receive a 24-word recovery seed. Write down the recovery seed on a piece of paper and store it securely. This seed is crucial for recovering your wallet if your Trezor device is lost or damaged. Confirm the seed by entering the words in the correct order when prompted by the Trezor Suite app.
Find Trezor Suite App
Finding the Trezor Suite app is easy. Go to the Trezor official website and navigate to the downloads section. The Trezor Suite app is available for multiple operating systems, including Windows, macOS, and Linux. Choose the version compatible with your operating system and download the installation file. Follow the installation instructions specific to your OS to complete the setup. The Trezor Suite app provides a user-friendly interface to manage your Trezor hardware wallet, monitor your crypto assets, and perform secure transactions.
Log in to Trezor Bridge App
Logging in to the Trezor Bridge app is necessary for connecting your Trezor device with third-party applications. Trezor Bridge acts as a communication layer between your Trezor hardware wallet and your computer. To log in, first, ensure that the Trezor Bridge app is installed on your computer. If it's not installed, download it from the Trezor website and follow the installation instructions. Once installed, open the Trezor Bridge app and connect your Trezor device via USB. The app will detect your device and prompt you to enter your PIN. After entering your PIN, you can access third-party applications that support Trezor integration, enabling you to use your Trezor hardware wallet with a wide range of services.